Welcome to the once a month blogger! The purpose of this blog is really to share ideas/thoughts/projects and maybe even a story or two!

I became a stay at home mom after having my second child. As a new stay at home mom I wanted a way to document the things I'm working on as well as share with anyone who might care to listen. I have gotten so many great ideas from others that I want to pay it forward in any way I can.

As for the name, "The Once a Month Blogger," Well, I have to be honest, that is extremely ambitious for me! I've had a personal blog site for about 6-7 years and have probably written on it less than a dozen times. My posts aren't likely to be long. I like to try to keep things as brief as possible!

As a warning, if you're looking for comic relief or inspiring literary genius...you won't find it here. But

I promise I will do my best to post once a month or more, even if only to briefly update you on a current project. Hopefully you can find something you'll like!

Showing posts with label DIY. Show all posts

Monday, March 12, 2018

Dollar Store Jar Make-over


I love Dollar Store make-overs!  They always make me feel so crafty and frugal!  If you're anything like us your money is always going to other things and home decor often gets put aside.  But when i can use a little paint we have lying around and something from the dollar store to make something that looks like it came straight from Anthropology I'm all over it!

This DIY planter is a super easy project that you can start and finish within a matter of hours!  I have far too many unfinished projects at my house, but this, my friends, is not one of them!  And the instructions are pretty clear, up until you get to the macrame portion.  (Don't worry, it's not that hard!)

Start with a clear jar or vase.  Grab some spray paint.  I used a Rustoleum paint and primer in Satin Heirloom White. 


I used three coats to get the jar completely covered.  When the paint was dry I painted ModPodge on the bottom and sprinkled glitter on it.  Or you can try gold pray paint or geometric shapes.  Just go crazy on it!    When everything is dry put pebbles in the bottom for drainage.  I used all purpose potting soil and a Pothos plant, because they're great indoor plants, but you can use whatever plant you choose! 

Last comes the macrame plant hanger.  I loosely followed a tutorial from Heylilahey.  You can find it here.  I didn't want it quite as long as she made hers, so I used  8 strands of 6 foot 3mm macrame cord.


 I honestly would have used longer pieces of cord since this didn't go quite as far as I want.  Next time I want to try 2 mm cord.  I ordered some on wish.com, so I'll post results from that as soon as I can!

I love this project because it's simple and can be changed to fit any style.  And if you're not into macrame, you can always leave the pot on a bookshelf or table!  I hope you enjoyed this tutorial and I'd love to see what you come up with!!


Tuesday, May 2, 2017

DIY Diaper Cake

If you don't know me, I'm the type of person that loves to be social, but I thrive best when I have two or three really good friends.  You know the kind I mean?  The bosom buddy, call you in the middle of the night, doesn't care if you see them ugly cry, friend.  I have one such friend that recently had a baby.  When I asked her what she needed she immediately replied, "diapers!"  That's the kind of friends we are.  Not afraid to ask for something she actually needs, rather than something "cute". 

But if you really know me, you know that I couldn't just wrap up a box of diapers and call it good.  It still had to be cute.  Enter the diaper cake.  What better way to offer such an unattractive gift?!  I also knew that she would need formula, and that I also wanted to be able to give her that "cute" thing that she wouldn't ask me for.  So this worked out perfectly!


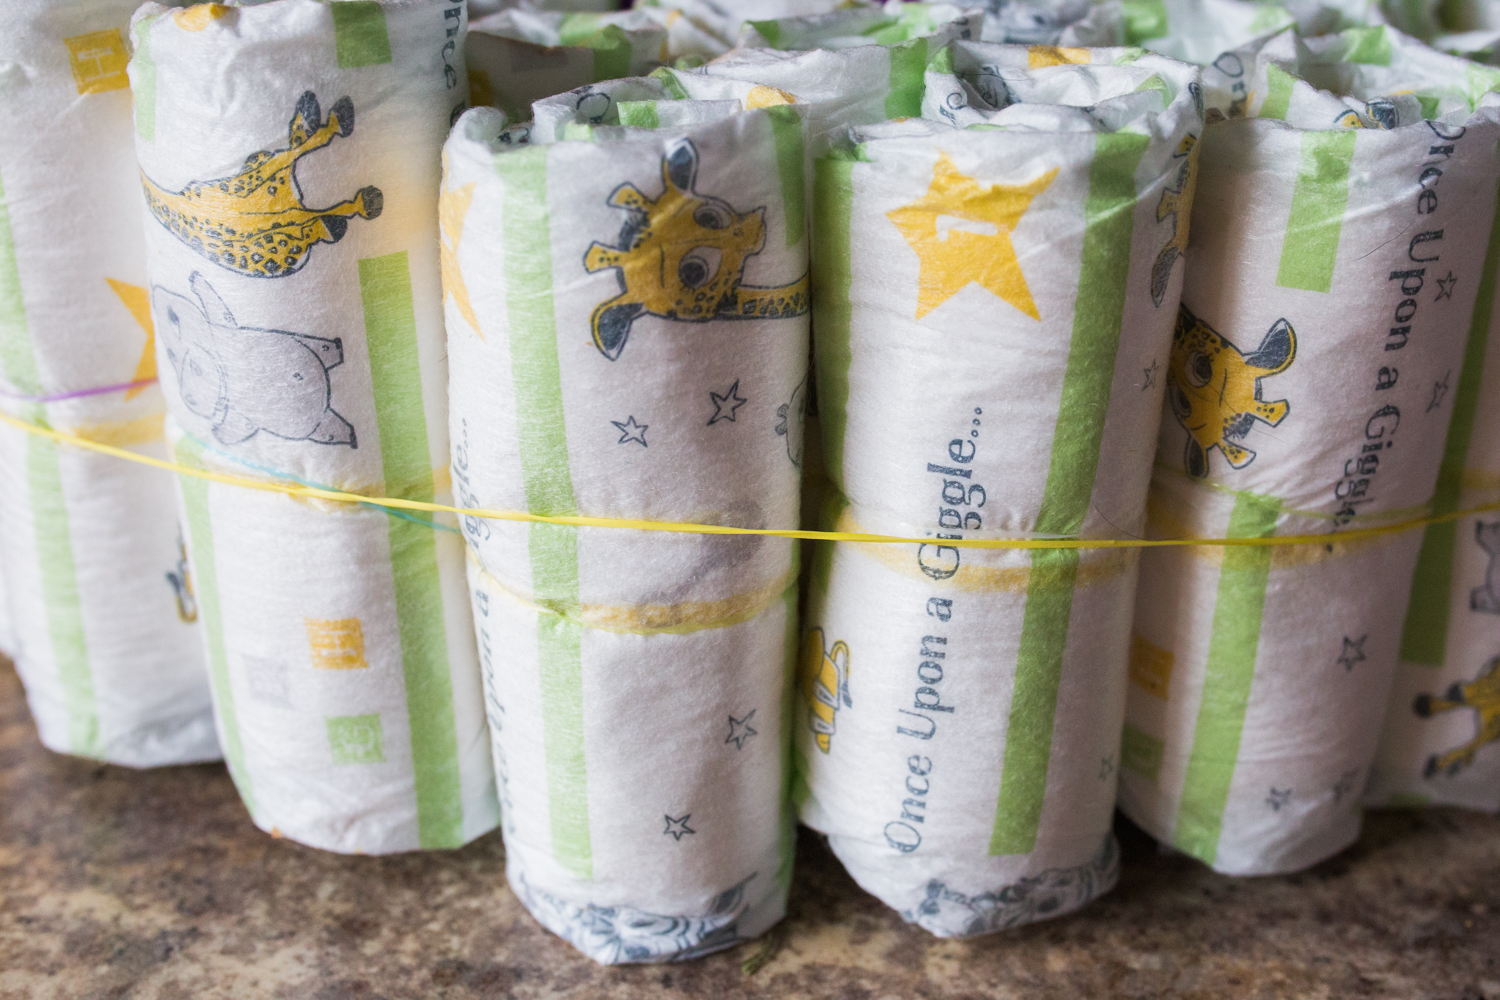
To make the diaper cake I used about 100 size 1 diapers.  I rolled up each diaper and put a little girl rubber hair tie around it, though that step isn't necessarily required.  I put a layer of rolled diapers around the formula container and held it in place with a regular rubberband.  I kept adding layers until I felt it was big enough for a base. 


For the next layer I started with three diapers in the middle and added more around the edge until, again, it was big enough to be the next layer.  Anytime I felt like the diapers were too much for me to hold on to I added a rubberband. 


For the top layer I wanted to give her a cute outfit, so I rolled it up to look loosely like a cake topper.  I surrounded it with rolled diapers until it was big enough for the top layer of a cake and secured it with a rubberband. 


I had some burlap ribbon lying around so I wrapped each layer with that, gluing the ends together.  I topped that with some cute ribbon, gluing those ends together.  That's it!  It's pretty simple and really doesn't take too long!  And it showed that there was more thought behind it than giving a box of diapers.  I'd love to see any of your fabulous diaper cake ideas!

Monday, June 15, 2015

Under the Sea Birthday Party

Things have been a little crazy lately, but I have some fun posts as of a result of the craziness of my life!!  One of my favorites is today's post.  I loved this Under the Sea Party. It was A LOT of work, but so worth it!  And it was fairly budget friendly too!

I tried to have a good combination of sweets/healthy food.  So here's what we have:

Seaweed grapes-  I found an awesome deal on grapes the Saturday before the party, so I put them on skewers and put them in the freezer until just before the party.  And who doesn't love frozen grapes?!
Ocean Jelly-  Blue raspberry Jello with whipped cream and swedish fish on a bed of graham cracker crust.
Goldfish Crackers
Shark Gummies- I found them in bulk at Winco.
Ocean Juice- Blue Koolaid packet with sugar and a 2 Liter bottle of Sprite.
Cake- Obviously!!
Starfish- Watermelon
Octopus Seaweed Dip- Yellow Bell Pepper cut to look like an octopus topped on a bowl of spinish dip.


 For decorations I wanted a backdrop that I could use to take pictures of each of the kids.  I've seen some really cute backdrops that used a lot of ribbon and lace.  They are super cute, but a little out of my budget.  So I just used streamers and some mesh netting I found at Joann's for a couple bucks.  The netting was originally about 12 inches wide, so I gut them into thirds.  I really liked how the shiny netting added to it. (plus, netting...fish...Just makes sense, right?!)  I did add a couple strands of ribbon, but I don't really feel like it added anything extra to the backdrop. 


The tablecloth was one of my favorite decorations!  It was really simple, and fairly cheap to make too.  I used fabric I found at Joann's.  The sequin-like material make it look like scales, though there was some material that looked even more like scales, but I wasn't about to spend $25 a yard on the fabric, even if I could  use a coupon on it! The fabric I got was $8 a yard and I used a 50% off coupon.  Doesn't get much better than that!  My table was 42" square, so I just got enough to cover the top.  I used strips of tulle for the "skirt" part of the table.  I needed about 3 1/3 yards for a 3 foot high table.  I only did three sides, though, so if you were going to do all 4 sides, you will need more. 

I also used a fishing net from the dollar store to hold up some balloons.  I attached some starfish that I purchased here onto the fishing net. 

I wanted the girls to be able to dress up for their picture, so I made a little mermaid skirt and a starfish headband.  I used the tutorial for the mermaid skirt found here.  For the headband I got sequin stretchy trim from Joann and used some shabby chic flowers, wedding veil netting, furry trim and a starfish.  I'm pleasantly surprised with the results!!


I also made an octopus out of a balloon and streamers, and jellyfish out of balloons, tulle, a plastic tablecloth, and ribbon.  I love the way they turned out too!! 


And what's an under the sea party without a few fish?!  Just a warning, though.  Without a filtering system, you'll need to find a way to continue to give them oxygen. I added some tap water (maybe not the best way) that seemed to help add some oxygen to the water.  Sadly, our fish didn't last too long...

For party favors I made some pearl necklaces with large pearl beads and some ribbon.  (I had to use a needle and pliers to get the ribbon through, because the pearl holes were so small.) 


As for the cake...I can't, by any means, claim that as my own!  I have an awesome friend who traded me a cake for a photo session.  Otherwise that cake probably would have cost me $75. 


Games:  For an under the sea party you have to have water games, right?!  We set up a couple kiddie pools for them to play in.  One had a board across it for a "walk the plank" game.  The favorite, by far, was the slip'n'slide.  We have a wonderful little hill in our backyard that is perfect for sledding in the winter and slip'n'slide in the summer.  The kids LOVED it. 


All in all, it was a super fun party.  I have to say, I'm glad it's over.  Now I can start stressing about my newest adventure, and coincidentally, my newest post series...Videography.  To stay posted on all my adventures, be sure to sign up for email notices!

Tuesday, May 19, 2015

Tips on tiling backsplash with SimpleMat

I have to say, this task was a bit daunting to me, having never tiled before, but once we got the hang of things, it really wasn't so bad.  And we're so happy with the results!! 


We went to our local Home Depot and found some tile we like.  Looking back it would have saved us a ton of time to use the sheets of tile, instead of individual tile pieces, but it ultimately saved us money to do it this way, and we really liked the natural stone look. 

Here's out Materials list:

  • Tile - We used 11 packages of 9 stones each (equal to 1 sq ft.).  Each pack was $4. - $44
  • SimpleMat- We got the large roll 30 sq ft. - $50
  • 3/16" spacers -$3
  • rubber grout float- $4
  • Sponge - $2
  • Grout- 2 containers of 1qt alabaster premixed SimpleGrout- $11 each - $22
Total = $125

We borrowed a tile saw from a friend and he came over to help us get started.
Now, there are a ton of videos out there on how to tile, etc.  They're worth looking at.  This post is mainly a review of, and tips for using SimpleMat. 

We didn't want to have to deal with thinset since this was such as small project and using Simplemat seemed so easy.  Basically it's a super sticky glue-like backing to place your tile on.  It really does seem like it would be a great product in the right setting. 

Would I use it if I was to do this project over again?  No.  Here's why.  Because we did a diamond pattern instead of a square pattern, we had to make a lot of cuts.  When you cut with a tile saw the pieces get wet.  Water and SimpleMat don't mix well.  We found that if our pieces were even slightly damp they had a hard time sticking to the wall.  After the first few experiences we got out the blow dryer and we didn't have much trouble after that. 

If you're doing a project without a lot of cuts, it might be a good option for you.  I also think if we were to do another backsplash, say in our bathroom, and we were using the sheets of tile, I would probably give SimpleMat another shot.  I can see how it might be really easy and mess-free to use with the sheets.  

Quick Tips:
  • Don't put tile on SimpleMat when tile is wet
  • If you're set on using SimpleMat, choose a tile the is not too large or too heavy
  • Sheets of tile, rather than individual pieces, are likely your best bet.
  • Don't put it on your wall until you're sure it's where you want it.  If you try to peel it off you'll pull off paint too.

Saturday, May 9, 2015

Star Spangled Banner


In preparation for Memorial Day and Fourth of July I wanted to make another banner.  So, out came my cricut!  I don't use it very often, but it does come in handy for projects like this. I scored some scrapbook paper at Joann's for 6 for $1 that I was planning on using as a flag banner for a cake smash, but I ended up using something else.  I decided this would be perfect for my star banner!  It's such a simple project and I love the way it looks, don't you?! 


I used 6 sheets of 12X12 scrapbook paper: 2 blue, 2 red and 2 white.  I used the "Plantain Schoolbook" cartridge (the one that comes with the cricut).  I set the size to 2 1/2" and chose the "fill page" option.  It cut 16 two and a half inch stars.  I did that for one page of each color. 


Then I did the same thing with the other three pages, except the setting was for 3 1/2" stars.  That gave me 9 stars per page. 


Then I used white thread and my sewing machine and sewed all the stars together.  It's that easy!!


Thursday, April 23, 2015

Hanging Shelves - DIY Beach Series

This project doesn't get much easier and I LOVE the way it looks.  In fact, so far, this is my favorite project. 


Materials:
  • 1'X2' Boards- I got mine at Home Depot.  They were in the shelf section.  They were already white so I loved that I didn't have to do any painting.  Each was $4.
  • Rope- I got mine from Joann's in the home decor section.  I believe it was 3/4".   It came in a package and was about $13 for the whole pack.
  • Cleats- Also from Home Depot.  These ones are about 6".  $3 each.
  • Drill and drill bit the size you want. We did ours 1".

You'll probably do some adjusting based on how you want yours to look.
These are just general instructions.  I won't get too specific.  If you have questions about how we did ours, please ask!

Drill a hole at each corner.  I made them about an inch from each side. Slip the rope through and tie a knot at the bottoms


Drill the cleats into the wall. and hang the shelves by the rope.  You can just lay it over the cleats or you can do like we did and wrap it around a few times.  Mostly we did that because our rope was too long.  It ended up making it a little more stable so it doesn't sway so much.  We also considered putting something sticky on the back and attaching it to the wall so it wouldn't move around, but with the way we tied the rope, we decided it wasn't a big deal.


And that's it!!!

Thursday, February 5, 2015

DIY Beach Bedroom Series: DIY Dollar Store Nautical Trash Basket

This is going to be a quick post.  The project is fairly self explanatory.  I've just included a couple pictures to help out.

Materials:
Waste paper basket from the dollar store. 
Twisted Jute (I got mine from Joann's in the craft section.  $4.99 originally, but I hardly ever buy anything at Joann's without a coupon!)
Hot glue gun and glue sticks (it took about 7 glue sticks for my basket)

First put one end of your jute through a hole at the bottom edge of your basket and glue securely.  Start wrapping the jute around the basket, gluing every couple inches.


Make your way to the top.  Tuck in the end at the top and glue down.


Start another end close to where you began, but now glue in a circle towards the center of the bottom of the basket.  Once you get to the center, tuck the end through the basket and glue down.  Ta-da!!


DIY Bedroom Series: $10 DIY Blanket Ladder


I love this ladder!  If you're anything like me, you have blankets everywhere cluttering up linen closets or piled in the corner of the room just taking up space.  I feel like we have blankets coming out of our ears.  Winter in Utah can be a little chilly, so we always need the blankets handy, but I hate having them on the floor.  Anyone else ever worried about spiders crawling out?  Seriously creepy.  Problem solved!  way to keep blankets off the ground and can also be a great way to display quilts, etc.  Plus, when you can make it for $10, what could be better?!

Materials:
As a perfect beginner project, the only tool you really need is a drill.  You'll also need wood, 2" screws, stain/paint of choice, and some brushes.

We purchased our wood at Home Depot.  We got a 16 foot 2x4 piece for $7.  We had them cut it right there at the store.  For this ladder we did two 5' pieces and four 18" pieces, however, when we do another one I think I'd prefer shortening the "rungs" to 15" and increasing the length by 6". 

Once you have all the pieces cut and you've made it home with all your supplies you'll need to decide where you want your rungs.  We started our first about 6" from the top and each one under that was 12" from the bottom edge of the rung.  We made the angle so that the corners of the rung were flush with the sides of the ladder.  Really you can do whatever angle you'd like.  It's not rocket science here! 

Mark the boards where you are going to place them.  Pre-drill holes with a bit that is comparable to the screws you're using. 


(Ours is marked twice because I had my husband lower the rungs a bit.  If you're lucky you might just only have to mark them once!)

 
Now, my husband screwed each rung to both sides first.  It may be easier to screw each rung into one side, then screw it into the other side.  I leave that up to you.


*Note:  I stained the ladder after it was all put together.  If you prefer, you can stain/paint it before it's screwed together. 

Once it's all put together, you really should sand it a little before staining, but being the lazy person I am, I didn't. 


 For this ladder, I used Minwax Dark Walnut 2716.  It's what I had left over from a bench we made.  I truly do love the dark stain, but I think we'll make another ladder and this time paint it white, or if I get really ambitious I may try to give it more of the weathered look to fit in better with the beach theme.  I mean, really, you can never have too many of these hanging around!

Follow directions on your stain.  Again, with this project I was a little lazy.  I just used a foam brush to paint on the stain and then used an old rag to wipe it off.  I did two coats.  The second coat I left on for a few hours and then wiped it down.  I left the stain overnight before applying a coat of Minwax Polycrylic
.
Apply 2-3 coats.  Then you're done!!  Hopefully that was pretty clear.  If you have any questions, let me know!

Friday, January 30, 2015

DIY Beach Bedroom Series-DIY Pillows

My husband and I are finally getting around to doing something with our bedroom.  We both love the beach, but since we're not likely to get there anytime soon, we decided to make an attempt at a beach-themed bedroom.  It actually really all started with the headboard.  We wanted to make one but couldn't agree on what we wanted.  We scoured Pinterest high and low and came across picket fence headboards.  The beach-theme just naturally fell into place. 
We finished the headboard before I started the blog, so I don't have before and after pictures, but just imagine a very light tan wall and nothing where the headboard used to be.  Pretty bland....  I also don't have any pictures of what it looked like along the way, but it shouldn't be too hard to imagine.

Here's what it looks like now...


Not at all the finished product, but you get the idea.  I sent a picture of it to my mom when we finished it.  She said it looked whimsical..........Not what I was going for.  Hopfully with a few nautical accents it'll look better.


Anyway, onto what this post is really about.  The pillows!  I love me some accent pillows!
I saw some pillows at Ross that I could almost love.  If they hadn't been so boring and still rather expensive for our budget bedroom, I might have gotten them.  But what I did love, and what screamed beach decor, was the burlap trim around the edge of the pillow.  Since I have been in love with burlap as of late, I thought, "this is the perfect quick and easy DIY project for me."  Well...yes and no.  If this is a first project for you, it can easily be done.  Just pick the right material.  The blue and the grey/white fabrics are both from the home decor section at Joann's.  They were both easy to work with, not to mention they were 60% off plus an additional 15% on top of that.  I only needed a half yard of each, so it was only a few bucks for each fabric.  I already had pillow forms laying around.  I found a coral color I loved in the remnant section, which happened to be 75% off.  It was taffeta, but I could work with that.  So far, I was doing pretty good.  Now for the trim.  Here's a little tip...skip the trim section and look for the ribbon.  They have burlap ribbon that is way cheaper than the trim; however, they did have some burlap trim that I wanted to try on the coral pillow.  You can see it in the picture above.  It has decorative holes in it, that I think make it look a little more interesting.  If I was to do it over, though, I'd skip that too.  It was so hard to work with, especially on taffeta.  But it did give some nice contrast.

Step 1:
Figure out the size you'll need for your pillows.  If you're buying a pillow form the packaging will tell you what size it it.  Add about an inch to each side.  If you're using old pillows, take off the covering and lay it over your fabric.


Cut about an inch around each edge.  Turn right sides together.  Sew 1/2" seams around all edges, leaving a generous amount (I left about 10" but it depends on the size of your pillow) on one side open for stuffing the pillow inside.

When you turn the case right side out you want it about a half inch to an inch bigger than the pillow form.

You will be sewing the trim around the edge, so you will need this extra space.  It's easiest to sew the trim on without the pillow inside, so you'll sew the three edges first, stuff the pillow in and then sew the fourth edge with the pillow inside.

I bought ribbon that was about 2 1/2 inches wides, so I folded the two sides in and ironed it flat on a low setting.


Then I folded the ribbon in half and sewed to the edge of the pillow.


I also didn't try to do anything fancy with the corners.  Just straight lines on every edge.  When you get to the fourth edge it will be the same, just a little trickier, as you'll have the pillow inside. 

In the end, you'll have an awesome new pillow!  Good luck!!